How to Install a Ball Valve: Step-by-Step Guide
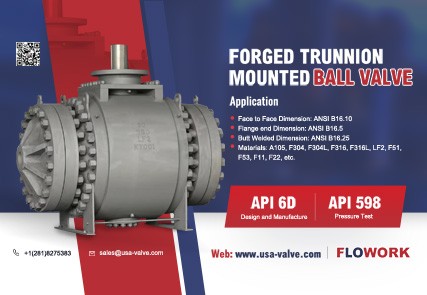
This article will provide you with a detailed guide to ball valve installation, including important steps such as pre-installation preparation, inspection of the ball valve, preparation of pipelines, installation steps, connecting pipelines, testing of ball valves, and maintenance. By following these steps, you will be able to properly install your ball valve and ensure it operates properly, providing a reliable fluid control solution for your application ball valve manufacture.
As a common fluid control device, ball valves are widely used in various industrial and commercial fields. Proper installation of a ball valve is essential to ensure its proper operation and extended service life. This article will provide you with a detailed ball valve installation guide to help you avoid common mistakes and problems during the installation process to provide the best fluid control solution for your application.
Preparation before installation
Before starting to install the ball valve, adequate preparations need to be made. First, make sure you have purchased the appropriate size and type of ball valve to meet the needs of your application. Secondly, have all necessary tools and materials ready, such as wrenches, screwdrivers, washers, bolts and nuts, etc. These tools and materials will play an important role in the installation process, globe valve manufacture.
Check ball valve
Before installation, the ball valve needs to be inspected to ensure it is in good condition. First, check the appearance of the ball valve for damage or defects, such as scratches, dents or cracks. Second, gently rotate the ball to make sure it rotates smoothly and is not stuck or blocked. If the ball does not rotate smoothly, it may cause problems such as inaccurate fluid control or leakage.

Prepare pipeline
Before installing the ball valve, you need to prepare the pipes to be connected. First, clean the inside of the pipe to make sure there are no impurities or obstructions. Ducts can be cleaned using an appropriate cleaning agent. Secondly, check whether the pipes are damaged or cracked. If there are any problems, they should be replaced in time. Make sure the diameter of the pipe matches the inlet and outlet dimensions of the ball valve to ensure a tight connection and no leaks, check valve manufacture.
installation steps
Place the ball valve on the pipe, making sure it is aligned with the pipe. Note that the inlet and outlet directions of the ball valve should be consistent with the flow direction of the pipe.
Use bolts and nuts to secure the ball valve to the pipe. Make sure the bolts and nuts are tightened evenly and not too tight or too loose. Too tight may cause damage to the ball valve or pipe, and too loose may cause leakage.
When tightening bolts and nuts, you can use appropriate lubricants to reduce friction and prevent damage to the threads. But please avoid using too much lubricant as it may flow into the ball and affect its function, butterfly valve factory.
During installation, be sure not to damage any parts on the ball valve, especially the sealing surface and the ball itself. Damage to these components may affect the performance and service life of the ball valve.
After installation is complete, check again that the ball valve is tightly connected to the pipe and that all bolts and nuts are tightened in place. If there is any looseness or leakage, reinstall it immediately and fix the problem gate valve manufacture.
Connect pipes
After installing the ball valve, you need to connect the pipes to the inlet and outlet of the ball valve. Make sure the connections are tight and there are no leaks. Use appropriate sealing materials, such as gaskets or sealants, to ensure that connections are watertight. When tightening connecting bolts, follow the appropriate tightening sequence and intensity to avoid damaging the threads or causing leaks.
Test ball valve
After installation is complete, the ball valve needs to be tested to ensure it is working properly. First, open and close the ball valve several times to check whether its rotation is flexible and there is no jamming or blockage. Secondly, check the connections for leaks. If any problems or leaks are found, stop using it immediately and check the cause for repair. Appropriate detection tools can be used during the testing process to assist in detecting leaks to improve detection accuracy and efficiency bronze valve factory.
maintenance
In order to extend the service life of the ball valve and ensure its normal operation, it is necessary to perform regular maintenance on the ball valve, including cleaning, lubrication and inspection of sealing performance. During the cleaning process, you can use a soft cloth to wipe surface stains and use a suitable detergent to remove stubborn stains; during the lubrication process, you can use a special lubricant to lubricate the ball to reduce frictional resistance and improve operation smoothness; when checking the sealing performance, you can Observe whether the sealing surface is worn or scratched and perform necessary replacement or repair work.


